Mix Like a Pro Using Mid/Side Processing
Published on Friday 14 March 2025
If you mix it just right, you can turn a solid song into a bona-fide banger. The problem is that mixing isn’t easy, so if you’re struggling to make your tracks sound more professional, then you’re probably not using the pro-level technique known as mid/side processing. Thankfully, guest-blogger and producer Rutger Steenbergen is here to spill the beans.
What’s Mid/Side Processing?
- With mid/side processing, the audio is split up into the left and right (the sides) and middle. This way, you can work on specific mono and stereo elements, like equalisation, volume and volume, separately.
- Mid/side processing gives you more control over the space that any sound occupies, allowing you to make specific bits sound bigger or less prominent.
- The mid bit combines the audio on the left and right.
- The sides include information from the right channel minus the left channel. In other words: the difference between both stereo channels.
A Professional Mix Always Sounds Better
As a producer, you’re always solving problems. The second you get one instrument right, another one is drowned out. So how do you make your mixes sound good no matter what speaker system it’s blasted through? Well, you basically have three options.
Option 1: Mixing Entirely in Mono
If all of the audio is in mono, you’ll always end up with a robust mix. All elements are equal and it really doesn’t matter if either the left or the right speaker sounds slightly better than the other. The only problem is that all-mono mixes don’t sound too sexy.
💡 Tip: Keep constant tabs on how your mono mix sounds. You can use a monitor controller with a dedicated mono control, or a dedicated plugin that enables you to create a mono masterbus. If you assign a special hotkey, you can quickly switch between stereo and mono.
For more info, read our article Mixing in Mono: The Secret to Better Mixes and check out the video below.
Option 2: Mixing in Stereo
In stereo, there’s a lot of room between the left and right speaker, which means that sounds don’t overlap as easily. On the other hand, if the conditions aren’t optimal, the mix can quickly start to sound thin, bassy or simply off.
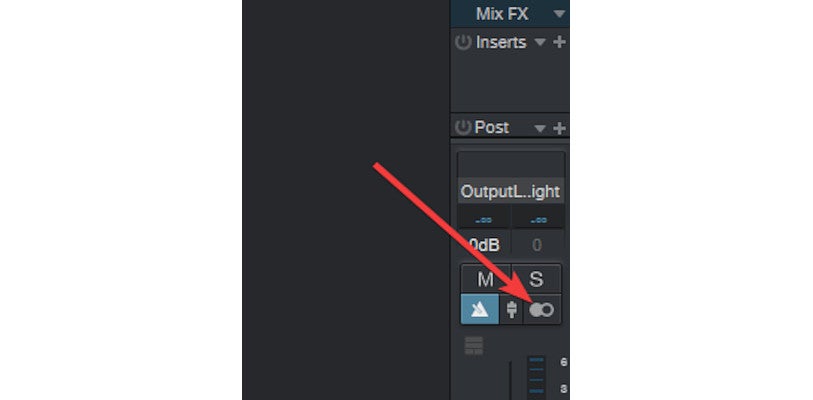
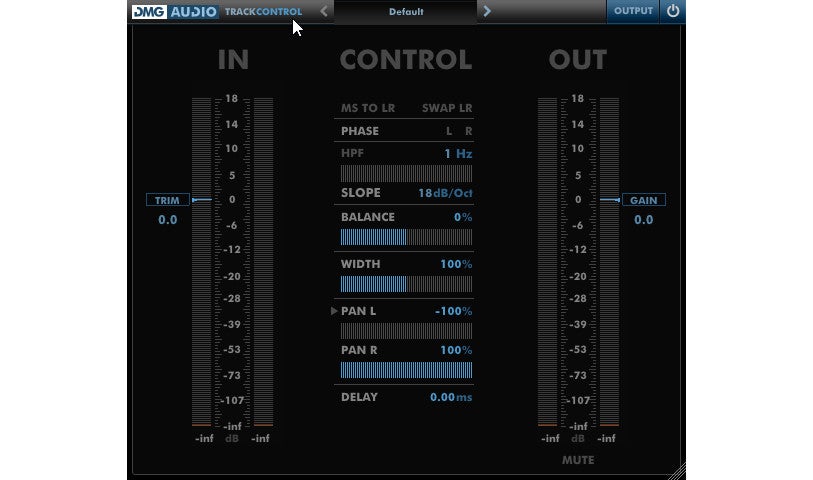
💡 Tip: Got a stereo sound that doesn’t slot properly into the mix? Try making it mono, either partly or in its entirety. An easy way to do this is via the Width control of the DMGAudio Trackcontrol plugin (free).
Option 3: Combine Mono and Stereo (Mid/Side Processing)
With mid/side processing, you get the best of both worlds: the perks of mono and the immersiveness of stereo.
💡 Tip: Many DAWs allow you to edit the frequencies below a certain threshold. If you’re a Studio One user, for example, you can use the Splitter tool to do this. If your DAW doesn’t have this option, then check out Mongoose by Boz Digital Labs. This plugin turns stereo audio into mono below a set threshold value and makes your mix sound cleaner.
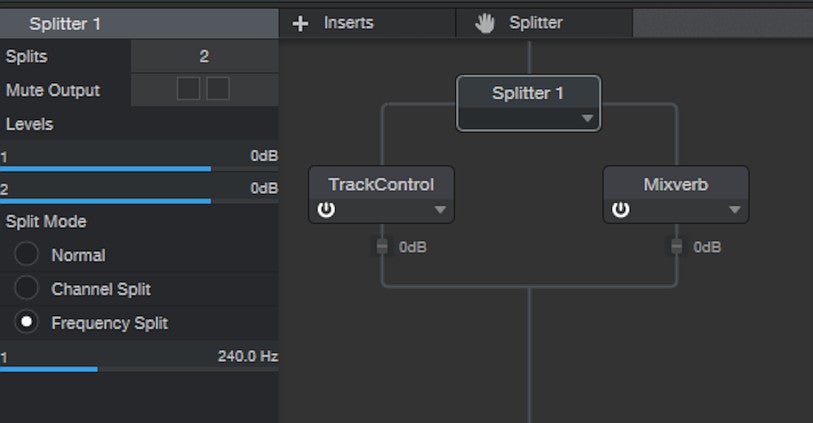
Using the Splitter tool in Studio One, you can subdivide audio based on frequencies. In the example above, everything in the signal below 240 Hz is converted to mono. The frequencies above the 240 Hz mark remain stereo and are packed out with a little reverb.
Mid/Side Processing in Practice
Spicing Up a Dance Beat
The beat is the most important part of any dance track. It needs to be robust and sound good at the same time. Using Ozone Imager (free), you can make the sides of your stereo audio louder. This makes everything sound broader and works really well for claps, snares and synth parts. Just don’t overdo it. If the width gets too extreme, the sound will subside in the mix. This is why you need to constantly check how your mix is holding up in mono.

Using Ozone Imager, you can boost the sides and make things sound extra wide.
Using Mid/Side Processing for Pop Songs
Mid/side processing is very effective in combination with mix busses, like the guitar bus in a pop mix.
- Add all of your guitar parts to a dedicated guitar bus and sic your M/S plug-in on it. Now use the automation to up the volume of the sides in the chorus. This’ll make your guitars sound bigger and broader, making your chorus sound more impacting — no panning tweaks needed.
- If you want to make a stereo instrument sound more clear and prominent without using a standard stereo EQ, then just boost the high frequencies of the sides. This also works well for reverb-enhanced sounds. It makes the reverb effect more prominent without affecting the core audio.
- Mid/side processing is also useful when mixing drums. You can use it to boost the side channel of your drum bus and accentuate the space. Or you can use it to boost the middle and put more emphasis on the snare and kick.
Mid/Side Compression for Better Snare Sound in Drum Loops
The downside of loops is that you have less control over the various parts that make up the whole. Mid/side compression gives you back some control and can be used for various fixes, including boosting snare presence. With standard compression, the effect is applied across the entire beat. With mid/side compression, you can zoom in on the middle or the sides and maintain a ‘calmer’ stereo image. Using a plugin like Ozone Dynamics, you can even specify the frequency bands that you want your compressor to focus on, giving you even more control over the mix.
Mid/Side Processing Tips for Vocals
In the video below, Billy Bush (producer for Garbage and other bands) demonstrates how he uses mid/side processing to widen vocals. Here are the steps he takes.
- Add an EQ with mid/side functionality to the vocal bus.
- Tone down the low frequencies in the sides and boost the same frequencies in the middle.
- Stick mainly to the sides when tweaking the high frequencies.
- Let the mid-range frequencies come from the middle.
Billy’s technique draws more of the listener’s attention to the sides while maintaining a punchy, mono middle. This works especially well for channels that include a bunch of stereo effects, like reverb and delay. To widen your vocals some more, you can use a stereo widener plugin for the finishing touch.
Mid/Side Processing Tips for Dance
- You can make reverb sound bigger by EQ’ing the high frequencies in the sides. You can even enhance this effect with a compressor.
- Feel free to experiment with EQ and compression automation for the sides. You can easily add extra contrast to your track this way.
- Only apply side-chain compression to a side channel. This’ll give you fresh and unique results.
Check out this article to learn how you can apply this technique using Voxengo’s free MSED (Mid Side Encoder Decoder) plugin.
Useful Plugins for Mid/Side Processing
- These days, a lot of plugins feature mid/side options. Fabfilter, Waves and Izotope each offer up excellent paid plugins, but TBPro Audio’s free Isol8 plugin is also worth a mention.
- You can also use a separate plugin to convert stereo audio into mid/side. The free Voxengo MSED plugin is a great example. Stick MSED on a stereo channel and set it to Encode. It’ll then send information from the middle to the left channel and send side-info to the right channel of your mixer, opening up the option to use any stereo plugin as a mid/side effect. EQs and compressors are the obvious choice, but saturation and distortion shouldn’t be overlooked here. Add a second MSED instance set to Decode and you’ve got an L/R stereo signal again.
Gain More Control Over the Mix With Mid/Side Processing
Mixing is like completing a puzzle without having access to all of the pieces right from the start. Mid/side processing simply makes things easier. A few final tips:
- First work on a convincing foundation mix that sounds good in both stereo and mono.
- Then focus on the details and the chocolate sprinkles on top.
- For example: you can use a stereo widener to make a clap or synth part sound bigger; weaken the sides of the piano channel to give guitars more room; or use side-compression to firm up the vocals in your vocal bus.
- Mid/side processing gives you options that standard L-R stereo processing doesn’t, but it takes experimentation to discover its full potential. Invest a little time and effort and before you know it, your mixes will sound better than ever.
See Also
» Effect Plugins
» DAW Software
» Studio Monitors
» Studio Headphones
» All Studio & Recording Gear
» Must-Have Plug-Ins for Music Production
» Mixing in Mono: The Secret to Better Mixes
» Mixing Drums – 6 Tips for Getting a Solid Foundation Sound
» Mixing the Low-End: How to Get that Thick & Punchy Layer
» Studio Subwoofers – The What & Why
» Should You Mix with Headphones?
» 5 Ways to Make Your Mix Sound Louder
» 3D Stereo Mixing: Create Depth with Just Two Speakers
» How to Prevent or Fix Phase Issues in the Studio
» Mixing Flawless Vocals in 5 Steps
» Mixing with the Mix Bus
» Get the Best Out of Your Studio Monitors with Absorbers & Diffusers