Build your own speakers? Read this first
Published on Wednesday 13 May 2026
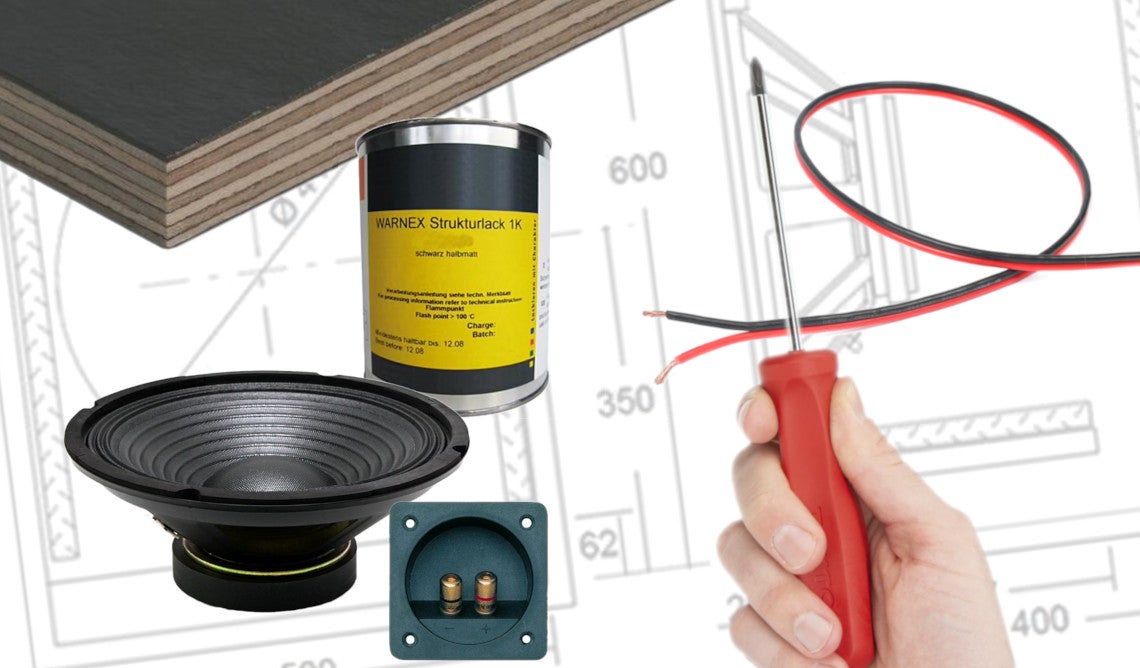
Imagine this: you’ve got some time on your hands, you’ve got some materials and tools lying around, it’s absolutely chucking it down, and you’ve got a little workshop where you can get stuck in. Then suddenly you think: “I’m going to build my own speakers!” We’ll help you get started.
DIY: better than off-the-shelf?
First, realise that it’s incredibly difficult to get a better result than an ‘off-the-shelf’ new product you can buy ready-made. That’s why this blog is aimed at beginners who are just stepping into the world of audio and simply want to gain some knowledge and experience. A hobby project purely for fun—not because it will sound better than a regular PA system. Maybe something you can use at home, in the garage, or perhaps you could even do a local community centre or club a favour with it! To understand what’s involved in building a loudspeaker (and by that we mean the complete cabinet with components), it helps to learn what such a cabinet actually consists of and what’s involved.
Wood or plastic?
Up to around the late ’90s, most budget pro-audio speaker cabinets were made of wood, covered with a kind of felt speaker carpet (or made from wood with a black/red/blue top layer) and fitted with a metal grille. As plastic production became capable of increasingly complex shapes and the first manufacturers brought plastic speaker cabinets to market, a new generation appeared that looked more modern, fresher and more stylish. That said, the characteristic wooden speaker cabinet still has its place today—especially for subwoofers—because wood simply has slightly better properties than plastic when you need thick walls. What’s more, wood is easy to brace. A brace is a kind of reinforcement beam that can run across your speaker cabinet, or be connected to one side (panel) of the cabinet to add rigidity.

Subwoofer or full-range speaker cabinet?
If you want to start making your own speakers, you’ll first need to decide what exactly you want to build. Do you want to make a subwoofer or a full-range cabinet? You may know a subwoofer from your home cinema system, another PA system, or perhaps from car audio. It’s usually a fairly square, boxy cabinet with one driver installed, focusing on the reproduction of low frequencies. A full-range cabinet, however, has multiple components that also need to work together in harmony to create a nice, clean sound. It usually contains at least a woofer (for low, low-mid and mid) and a tweeter for high frequencies. This is accompanied by a crossover network (crossover). A crossover takes the signal (usually coming from an amplifier) and splits the frequencies across the (in this case) two speaker components, so each gets what it can reproduce best.

For advanced builders: Thiele-Small parameters and calculating enclosures
As mentioned, this blog is mainly intended for beginners who first of all want to gain some experience and build something that at least produces sound. But if you want to build genuinely good speakers, you’ll need to work with the characteristics of your components. A good speaker builder/designer ensures a certain harmony in the choice of components, filters and cabinet construction. The latter has to do with (among other things) internal volume in litres, any damping, and the volume of any bass reflex ports. There’s all sorts of software and tools on the market to perform calculations, and these are usually based on the Thiele-Small parameters of the components—often shortened to T/S parameters. They typically include basic information about the component in question, including maximum excursion, impedance, power handling and more. You don’t need to know this in detail for a first try-out.
Finishing and assembly
Next, you’ll need to look at the enclosure you want to build around the components. As just mentioned: if you really want to do it properly, you should calculate the cabinet. But for a first test build, you’ll probably have your hands full as it is.
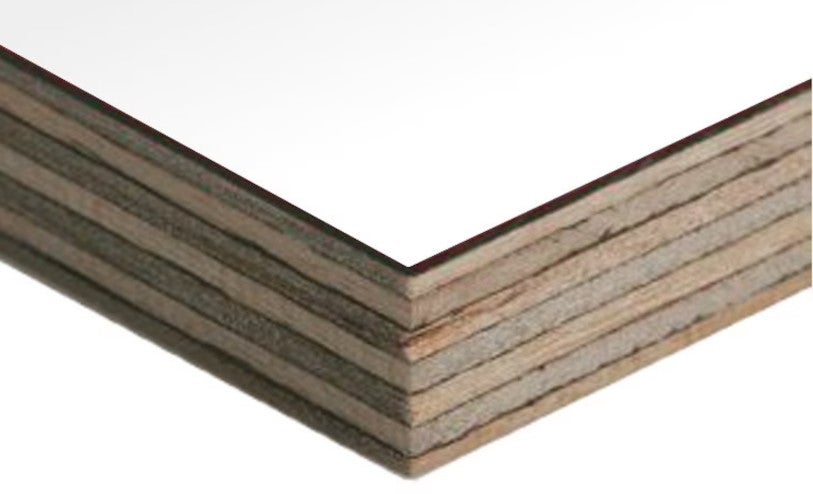
Plywood
A decent speaker cabinet is made from plywood. Not MDF, not random pallet wood strips you happen to have lying around in a corner. Use solid material that you can cut accurately for the best result. For a beginner project, thickness isn’t a huge factor, but 15 mm plywood is a good thickness to work with for a substantial speaker cabinet (such as a 12″ or 15″ full-range cabinet or subwoofer). If you’re building small speakers for use in and around the home (up to 10 inch), you can also choose MDF at around that thickness. MDF is also easier to machine, which is handy if you want to round the cabinet corners with a router, for example. Budget speaker cabinets that are mass-produced are sometimes made from chipboard and covered with felt to disguise the fact that the ‘wood’ underneath isn’t anything special. If you’re building cabinets yourself, however, it’s important to choose good wood, because it’s easier to work with and assemble. Everything needs to fit together properly and it absolutely mustn’t crumble—because that will ruin your result.
Assembly
A speaker cabinet is built using mechanical joints as well as glued construction. So make sure you have a good selection of screws; for example, self-tapping screws. But also make sure you have good wood glue, so you can seal gaps and holes properly and ensure the panels bond firmly together. Ideally, you want to build a kind of cube or ‘box’ that you’ll mount your components into—that’s the easiest method. If you already have a bit more knowledge about speaker building, you can start thinking about the options for installing a ‘baffle’. A baffle is basically the front panel of your speaker cabinet where the components are installed. The cabinet is usually built around it and provides some distance between the baffle (with components) and the actual speaker grille that covers and protects the entire front. This does require a bit more planning beforehand.

Hardware
Think about the hardware you want to use. Maybe you don’t want any hardware and you’re happy for the components to be screwed directly into the cabinet, with a wire sticking out to connect them to your amplifier—and that’s it. But if you’re building fairly substantial speakers that you’ll want to move around from time to time, then consider speaker hardware. Manufacturers like Penn Elcom offer speaker hardware such as metal cabinet corners, which help prevent damage if the corner of your speaker cabinet knocks into something. Also consider hardware like a connection plate, where you can mount different types of connectors—making it possible to connect to a wide variety of equipment without needing adaptors. Penn also offers speaker grilles. You can choose, for example, a plastic or metal grille that protects individual components like your woofer, or full sheets of mesh that complete the look of your speaker. If you go for the latter, you can even mount foam behind the grille, which makes the front look nicely finished and provides a buffer for your components. Think about moisture, but also dust, confetti and similar—depending on the application.
Warnex paint or cover it with speaker carpet?
When it comes to exterior finishing, there are several options. You’ll get a traditional look by covering your speaker cabinet with speaker carpet, often referred to as ‘felt’, although it can be made from different materials. This does require some skill and upholstery experience if you want everything to fit neatly and seamlessly. The more complex the cabinet shape, the harder it is to cover. You could also consider painting your speakers with a fairly scratch-resistant coating: Warnex. This special paint is applied as a top coat, usually with a texture roller to create a nice pattern. Many professional speaker cabinet manufacturers use it. Another advantage is that after years of use you can simply give it a fresh coat, and touch up any small but heavier damage along the way.
Wiring, connection plates, and so on
Also think about the preparations needed to connect your DIY speaker to an amplifier. Connecting a loose woofer isn’t too difficult and usually involves a red positive and black negative. If you’re using a tweeter, woofer and a filter or crossover, take a careful look at how everything needs to be wired, because the inputs and outputs are often clearly marked. Also make sure you use the right wire gauge. For a small speaker for use in and around the home, this isn’t very important, but it’s better to feed a large subwoofer with a cable that has sufficient thickness. A length of speaker cable with a 2.5 mm² core won’t break the bank, and in that respect a thicker cable is always better than a thinner one. For fixed installations, a cheap model of speaker cable is fine (often recognisable as two wires joined side-by-side—usually red/black). If you want something you can also use well for mobile setups, then choose a cable with a thick outer jacket. Internally it’s built the same way, but it has an additional round, protective, flexible sheath on the outside. You’ll often see this on speaker cables with locking connectors too.
» Speaker cable by the metre/on a reel

To make it easy to connect and disconnect your speakers, you can use connection plates so you can choose what’s most convenient in terms of connections. In the hi-fi world, hardware often uses binding posts/screw terminals or banana plugs. These are basically meant to be plugged in once and then left alone. But in the PA world, we prefer locking speaker connectors that you can connect and disconnect in seconds whenever needed. You could also consider making your speakers active, with a built-in amplifier module. That effectively means you screw an amplifier onto the back of your speaker, which then provides an amplified signal to your components. You will need to supply mains power to the amplifier module, as well as a line-level signal from, for example, your mixing desk or DJ controller. Also bear in mind that these kinds of DIY constructions aren’t cheap.
» Built-in amplifiers & modules

That should do it
By following these steps—and regardless of your woodworking skills—it should definitely be possible to build a simple, working speaker that you can genuinely use. If you enjoyed doing this, then next time look at what you could do better on your next build, so you can keep developing your skills. And the more you get into it, the more you’ll learn about the properties of speaker components. You’ll also start thinking about the impact of certain component characteristics—so you can make sure they fit your cabinet design.


No comments yet...